In this article, you'll learn how to add drivers to your VersaFleet account and manage them.
Adding Drivers individually
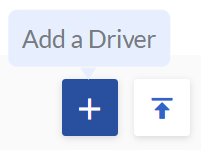
- Go to Fleet Management > Drivers
- Select + Add a Driver on the right to create a driver
- Fill in the fields related to the driver
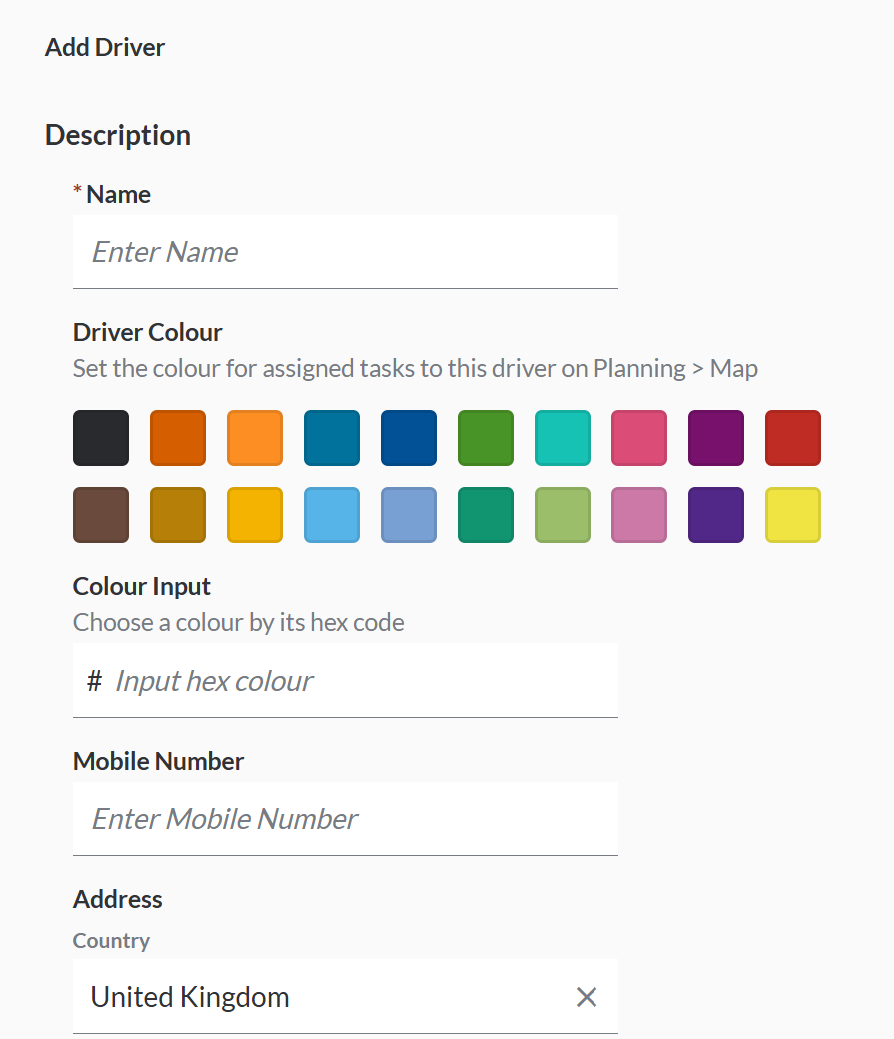
- Compulsory Field
- Name
- Optional Fields
- Driver Colour will be used on the assigned tasks for the driver and its driver icon on Planning > Map.
- Mobile Number
- Address will be used as a parameter for Route Optimisation. It can be used as a start location from the driver's home or as an end location to end at the driver's home.
- Driver Specifications will be used as a parameter for Route Optimisation. The required trait of the task will be matched agains the Driver Specification. There can be multiple Driver Specifications configured for each driver. Some examples of Driver Specificatoins are:
- License Type: Class 4
- Permit Type: Airport Pass
- Item Hanlding: Furniture Assembly
- Compulsory Field
- Hit Save Driver to create the driver.
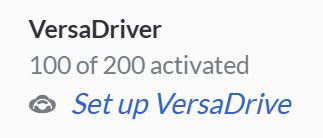
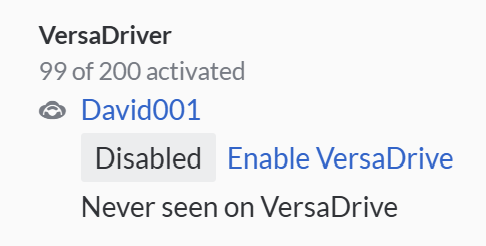
Creating a VersaDrive account for the driver
To create VersaDrive login credentials for drivers,
- Go to Fleet Management > Drivers
- Click into the driver and click Set up VersaDrive
- Username should have a minimum of 6 and a maximum of 50 characters, and Password should have a minimum of 6 and a maximum of 15 characters.
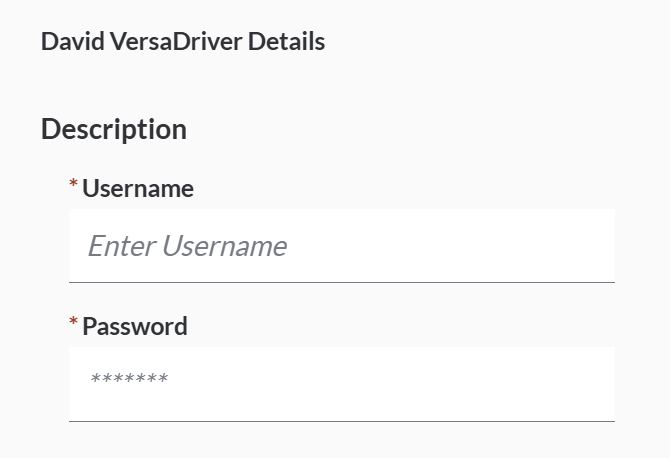
- Hit Save Driver to save the login credentials.
- To activate the VersaDrive account, click Enable VersaDrive. To deactive it, click Disable VersaDrive.
Adding a Default Vehicle for the driver
To pair a default vehicle to a driver,
- Go to Fleet Management > Drivers
- Click into the driver and click Set default vehicle. Choose the vehicle from the dropdown list and click Save.
 Note: There can be multiple drivers paired to a vehicle.
Adding Drivers through the Import function
- Go to Fleet Management > Drivers
- Select the Import Drivers button on the right

- Download the Driver Import Template and open the spreadsheet.
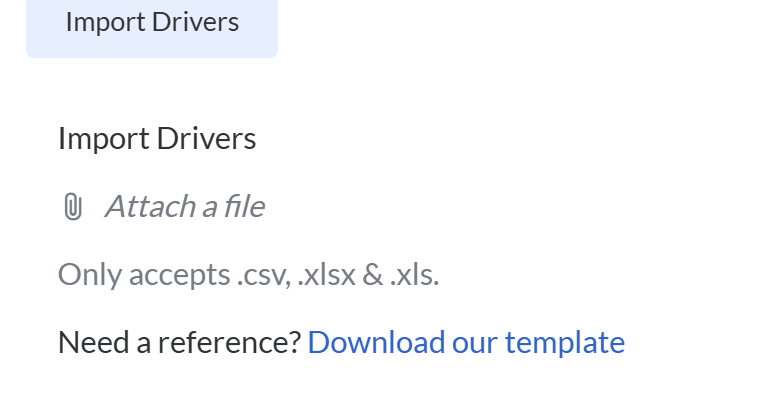 Fill in Driver information according to fields listed in Rows 2 - 3.
The example is shown in row 4 which you should delete before saving the file.
Driver Name and Default Vehicle are compulsory - the file will be rejected if the compulsory fields are blank. Save the file once you're done.
 - Back to VersaFleet, click attach the Driver Import Template.
Click Import Drivers and the information will be saved right into VersaFleet.
Driver Availability
Driver Availability can be set in VersaDrive. If a driver is not available, he can set this with his VersaDrive account.
Removing Drivers
Drivers can only be removed temporarily by archiving them.
To archive a Driver,
- Go to Fleet Management > Drivers
- Select the Driver you'd like to archive and click on the Archive button.

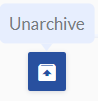
Restoring Archived Drivers
Archived Drivers can be restored and brought back into your active list of Drivers.
To restore a Driver,
- From the menu at the top right, select Archives > Drivers
- Select the Driver you'd like to restore and click on the Unarchive button
Next Steps
Now, let's proceed to create some Customers in VersaFleet™.