There are many approaches to assigning tasks to your drivers depending on your preferences and the factors to consider when you assign.
Assigning from a map
- Go to Planning > Map
- The tasks you create would appear as pins on the map. You may filter the tasks further by searching for the relevant information (tags, statuses and custom fields etc.) under Show Filters
- Switch to the Selection Mode and draw a box around a group of tasks to select

- Some tips:
- Hold down the spacebar to drag the map with any tool selected.
- To deselect a selected pin, hold the alt button and select the pin
- You may notice that there are dotted lines drawn from the selected pins to a warehouse icon (this represents a base task, either a pickup or delivery) and it will automatically be selected when you select one of its tasks.
- Some tips:
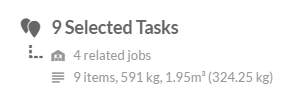
- Once the tasks have been selected, you can view a quick summary of the item quantities and dimensions
- To assign the tasks to a driver, select the Assign button on the right and choose a driver and vehicle from the drop-down list
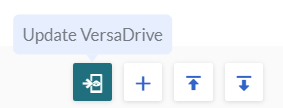
- To send out the tasks to your drivers, hit the Update VersaDrive button
- Once assigned, you can see a summary of task details - total estimated travelled time, distance and the sum of item quantities and dimensions.
If you'd like to change the sequence of the tasks, you may rearrange them. From the panel on the right, click on a task and drag to its new position. You can also view the number of tasks at a glance based on the task and status
Troubleshooting:
- Why do some of the tasks not appear on the map?
- It might be an address issue - check that the address is correct.
Or, it might be a case of missing digits in the postal code. For example, if you use the import function to create jobs and tasks, and the postal code is 048581, Excel might have removed the '0' digit. There are two ways to fix this in the import template: (1) Append (') in front of the postal code so that it'll look like this: '048581, or (2) Format the Postal Code column to Text.
- It might be an address issue - check that the address is correct.
- Why does the status reflect 'Unassigned' when I have assigned the task?
- Check that the task has been assigned to both a driver and a vehicle. Hover over that particular task and hit the Assign button. Ensure that both driver and vehicle have been selected before clicking on Assign Driver.
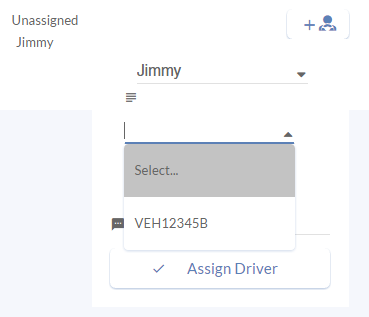
- Check that the task has been assigned to both a driver and a vehicle. Hover over that particular task and hit the Assign button. Ensure that both driver and vehicle have been selected before clicking on Assign Driver.
Route Optimisation
To allocate the most efficient route to drivers, we have the Optimisation feature that would help to reduce your planning time.
- Go to Planning > Map
- Press the Select Mode key and select all the unassigned tasks. Once all the tasks are selected, click Optimise
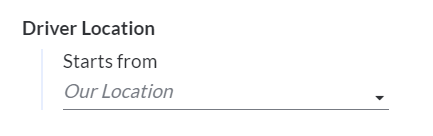
- Choose your starting location (optional)
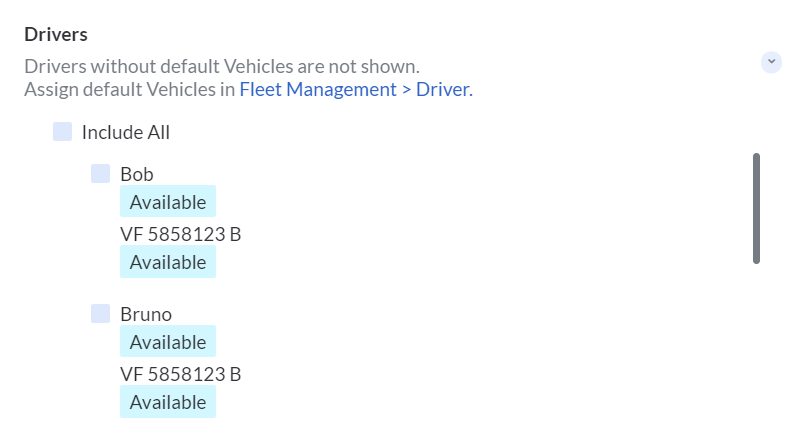
- You can choose the maximum number of tasks per driver and decide on whether to minimise drivers assigned, even distribution by number of tasks per driver and even distribution by working hours per driver. The vehicle's maximum cargo weight and volume will be taken into consideration as well.
- You can input the service time, i.e. the time used to deliver or pick up the goods which will be factored in while optimising.
- Choose the drivers who are available
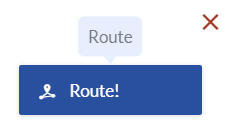
- Once all the information is entered, press Route! to see the optimised routes
- Once done, you will be able to see all the tasks assigned to the drivers and the routes taken by different drivers will be colour-coded.
Assigning from a list
- Go to Planning > Tasks
- The tasks you create would appear in a list view. You may filter the tasks further by searching for the relevant information (tags and statuses etc.)
- Select individual, multiple or all tasks by clicking on the top left-hand corner of each task. You can also view a quick summary of the item quantities and dimensions of the selected tasks
- To assign a task, simply hit the Assign button and choose a driver and vehicle from the drop-down list
- To send out the tasks to your drivers, hit Update VersaDrive
Printing Driver's Runsheet
In case there's a need to have a physical copy of the assigned tasks, you are able to print out Runsheets for your Drivers.
To print out Driver Runsheet,
- Go to Planning > Runsheets
- You may choose to view runsheets on a daily, weekly or monthly view

- Select the Driver to view their Runsheet for the dy
- Click on the Print button to print and the Driver's Runsheet in PDF will be generated
Reassigning Tasks
To reassign an assigned Task to another driver,
- Go to Planning > Tasks
- Hover over the task that you'd like to reassign and hit Reassign on the right
Or you can select the task and hit Reassign Driver.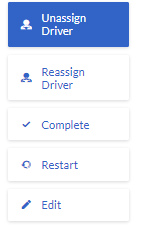
- Choose the new driver and vehicle from the drop-down list and hit the tick button
- To send out the tasks to your drivers, hit Update VersaDrive
Restarting Tasks
When your drivers have completed a task, they would tap on the Complete button on VersaDrve. If they have completed the task by accident, you may restart the task in VersaFleet. This will change the task status to 'Unassigned'.
To restart a task,
- Go to Planning > Tasks
- Hover over the task that you'd like to restart and hit Restart. Or you can select the task and hit Restart.

The task status will be restarted back to 'Unassigned'.
Completing Tasks on VersaFleet™
Besides completing successful tasks on VersaDrive™, you may also complete the tasks on VersaFleet™.
To complete a successful task,
- Go to Planning > Tasks
- Hover over the task that you'd like to complete and hit Complete. Or you can select the task and hit Complete.
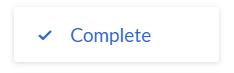 The task status will then be changed to 'Complete'
Note: The e-POD generated for each completed task through this method will not have any photos, recipient name, signature and actual COD recorded.