Custom Fields is an Add-On module that allows you to configure additional fields for your tasks. Contact us at customers@versafleet.co to activate this.
With Custom Fields, you can now:
- Create additional fields that suit your workflow
- Choose from a variety of text options - text, number, date and time
- Include a drop-down list of choices
- Choose whether to display these fields on VersaDrive and/ or MyJobs
Creating Custom Fields
- Go to Settings > Add-Ons.
- Select Custom Fields and hit + New Group.
- Give a name to this group of fields in Field Group Name.
Optional: Set which of your customers are able to select this Custom Field Group.- Give a name to this group of fields in Field Group Name.
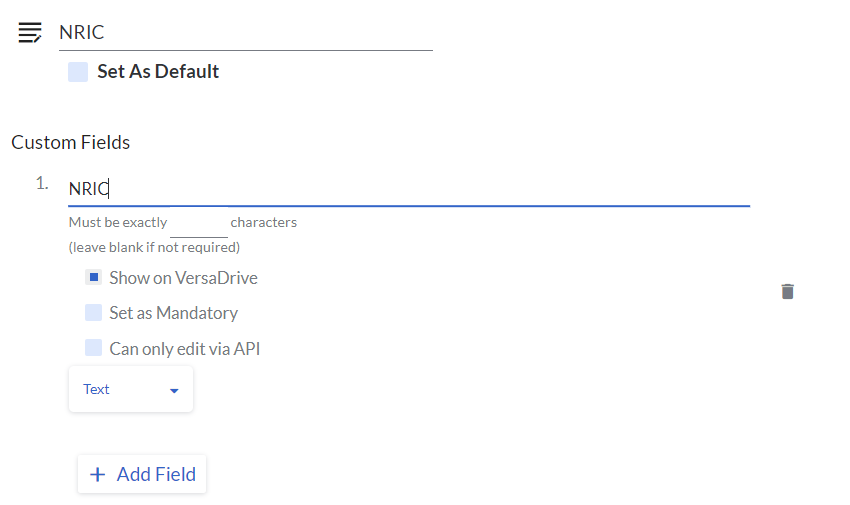
- Add the Custom Field and its details.
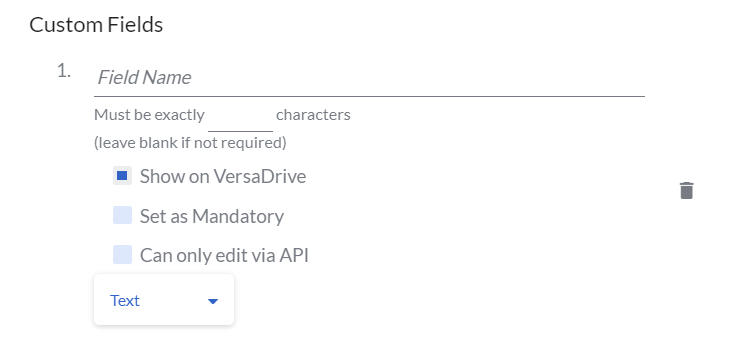
- Give a name to this Custom Field
- Select the type of field
- You may set a character limit for Text and Number types of fields
- You may also set this field to be shown on VersaDrive or as a mandatory field- Add the Custom Field and its details.
- Hit + Add Field to add more Custom Fields. Save Field Group when you're done.
Editing Custom Fields
- Go to Settings > Add-Ons.
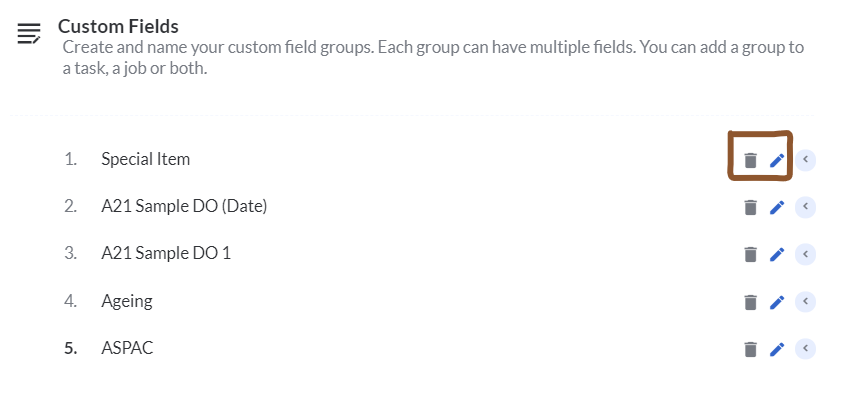
- Hit the pen button of the Custom Fields Group you'd like to edit.
- You may edit the name of the Custom Fields Group and the name of the Custom Fields. The changes will be reflected in all instances of its use.
Note: The contents and data types of existing fields cannot be changed as this will result in conflicts for existing tasks that use these fields. - You may edit the name of the Custom Fields Group and the name of the Custom Fields. The changes will be reflected in all instances of its use.
- Hit Save Field Group to save the changes.
Deleting Custom Fields
- Go to Settings > Add-Ons > Custom Fields
- Hit the pen button of the Custom Fields Group you'd like to edit.
- To delete the Custom Field, hit the trash icon of the field on the right.
- To delete the Custom Field, hit the trash icon of the field on the right.
Types of Custom Fields
Text and Number
The Text and Number field types allow you to key in either text or numbers. The Text field type accepts both text and numbers, while the Number field type only accepts numbers. You can also set a character limit for both field types.
Date and Time
The Date and Time field types provide a drop-down where users are able to select the date or the time they want.
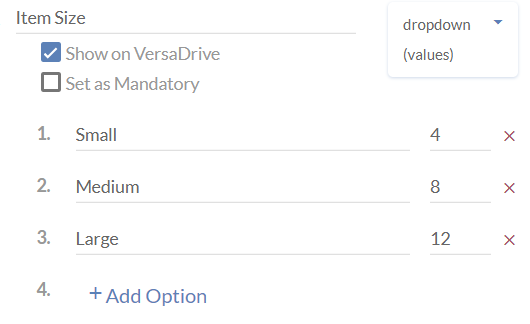
Dropdown
Create a list of options that are mutually exclusive and exactly one choice can be selected. If there are anywhere between 7 and 15 options, a dropdown list is a really good fit.
Dropdown with values
Just like the Dropdown, you can also have values attached to each option in the dropdown list.
Search List
Create dependent drop-down lists where a selected value in the first drop-down list determines the options in the second drop-down list.
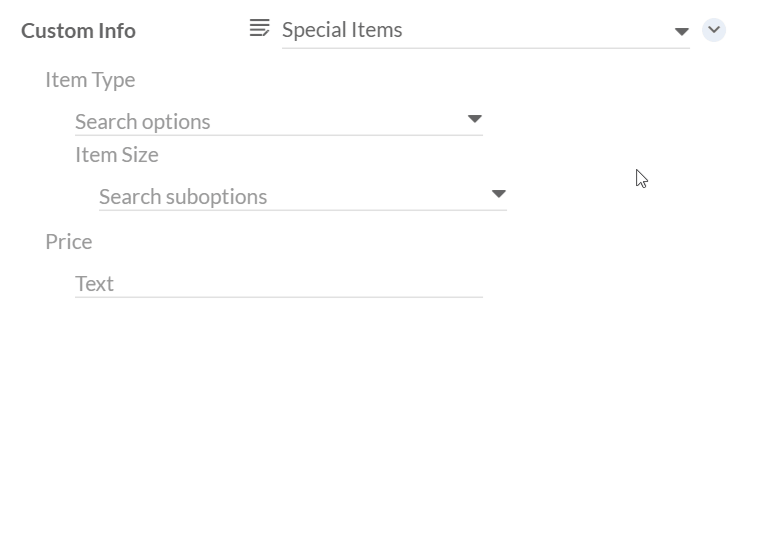
Here's how you create a Search List:
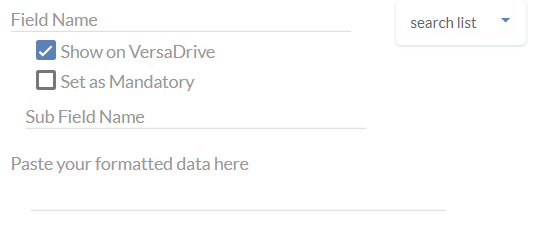
- Field Name: Name of the first drop-down list ("Item Type")
- Sub Field Name: Name of the second drop-down list ("Price")
- Insert formatted data in the following structure:
[ {"value":"Document","suboptions":["Small","Large"]}, {"value":"Parcel","suboptions":["Less than 2kg","Between 2 kg to 5 kg","More than 5 kg"]} ]
Choice
Create a list of two or more options that are mutually exclusive and exactly one choice can be selected.
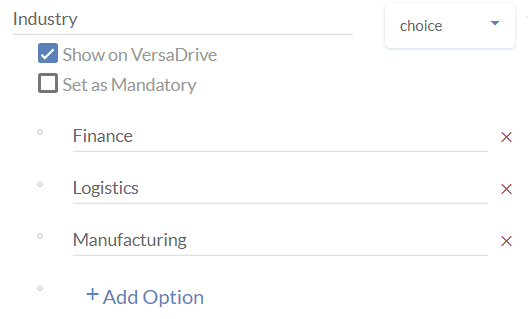
Choose Choice over Dropdown if the list of options is short.
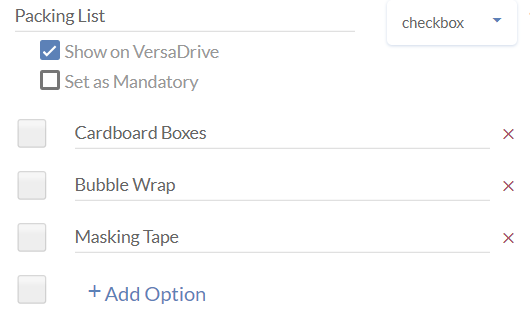
Checkbox
Set a list of options where any number of choices can be selected.
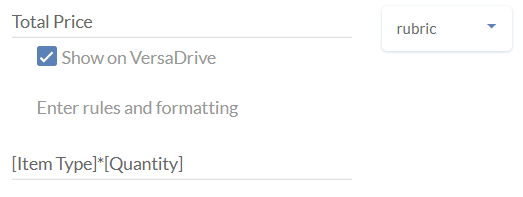
Rubric
Generate a formula that will calculate a result based on other fields. This field is great for calculating prices.
Setting up Data Verification
- Go to Settings > Add-Ons > Add New Group

- Go to Settings > Add-Ons > Add New Group
- While creating new Custom Field Group, keep the Show on Versa Drive checked and click Save Configuration
 Go to Settings > VersaDrive > Task Completion and set up Custom Notes
Set up Data Verification and type the Custom Note. Select the newly created Custom Field Group and Custom Field
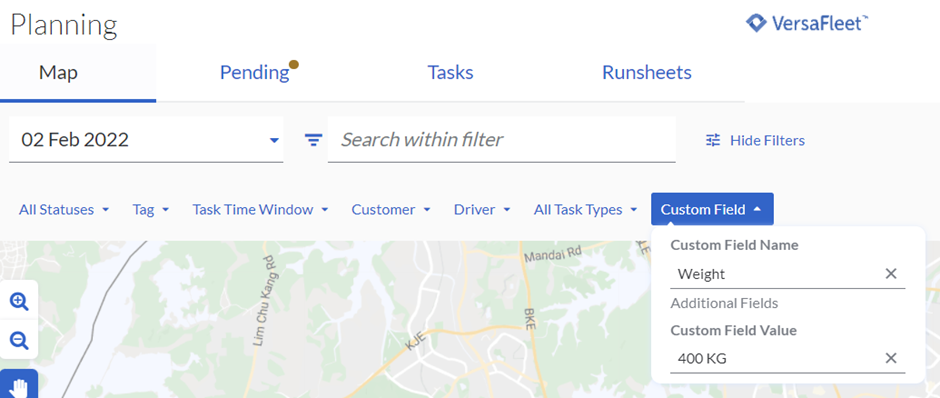
Filtering Custom Fields
To filter by Custom Fields,
- Go to Planning > Map/Tasks
- Hit Show Filters and the list of filters will be displayed
- Search for the Custom Fields by selecting the Custom Field Name and the Custom Field Value