Label allows users to create a label to be pasted on tasks or items for drivers to easily identify them. This document can be configured to contain important pieces of information, including:
- Identifier: Task ID, Tracking ID or Invoice Number
- Barcode: Task ID or Tracking ID
- Receiver Details (To)
- Item details
These labels can be printed from Planning > Tasks > Label. Barcodes on the Task Labels can be scanned by drivers via VersaDrive when collecting items.
Configuring Label
To configure a label,
- Go to Settings > Add-Ons > Label.

- Click on Edit Configurations.
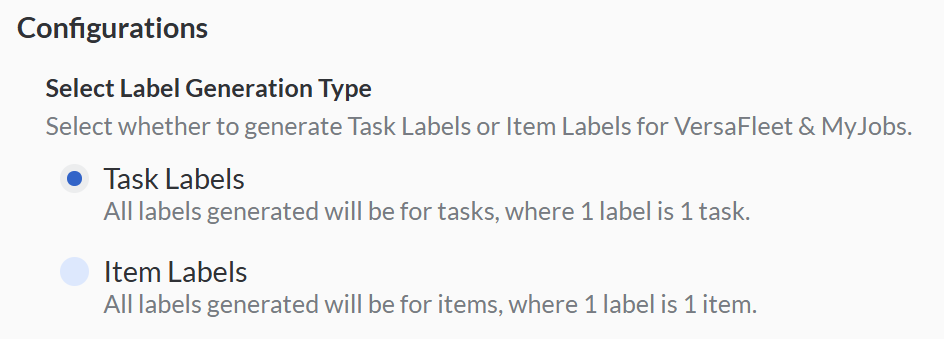
- Select whether to generate Task Labels or Item Labels for VersaFleet & MyJobs:
- Task Labels: All labels generated will be for tasks, where 1 label is 1 task.
- Item Labels: All labels generated will be for items, where 1 label is 1 item.
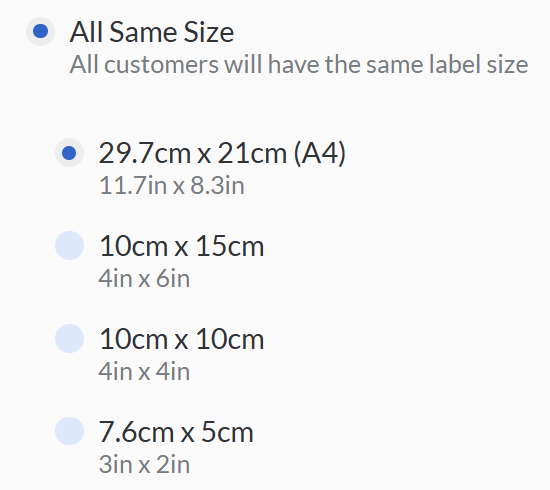
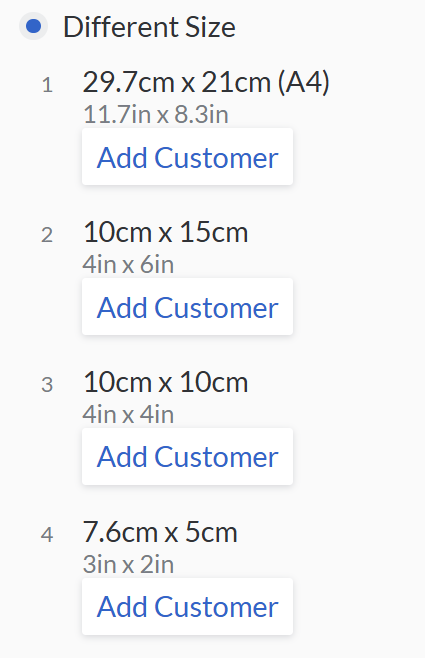
- Select which label size should be applied to which Customers in both VersaFleet & MyJobs:
- All Same Size: All customers will have the same label size
- Different Size: For different customer
- All Same Size: All customers will have the same label size
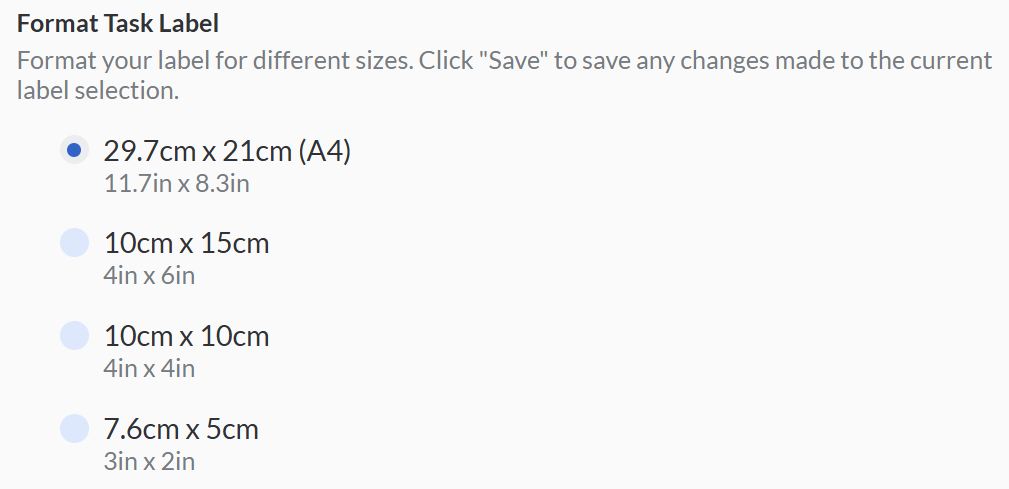
- Choose the format your label for different sizes.
- Edit the content in each section, then preview your Task Label as needed.
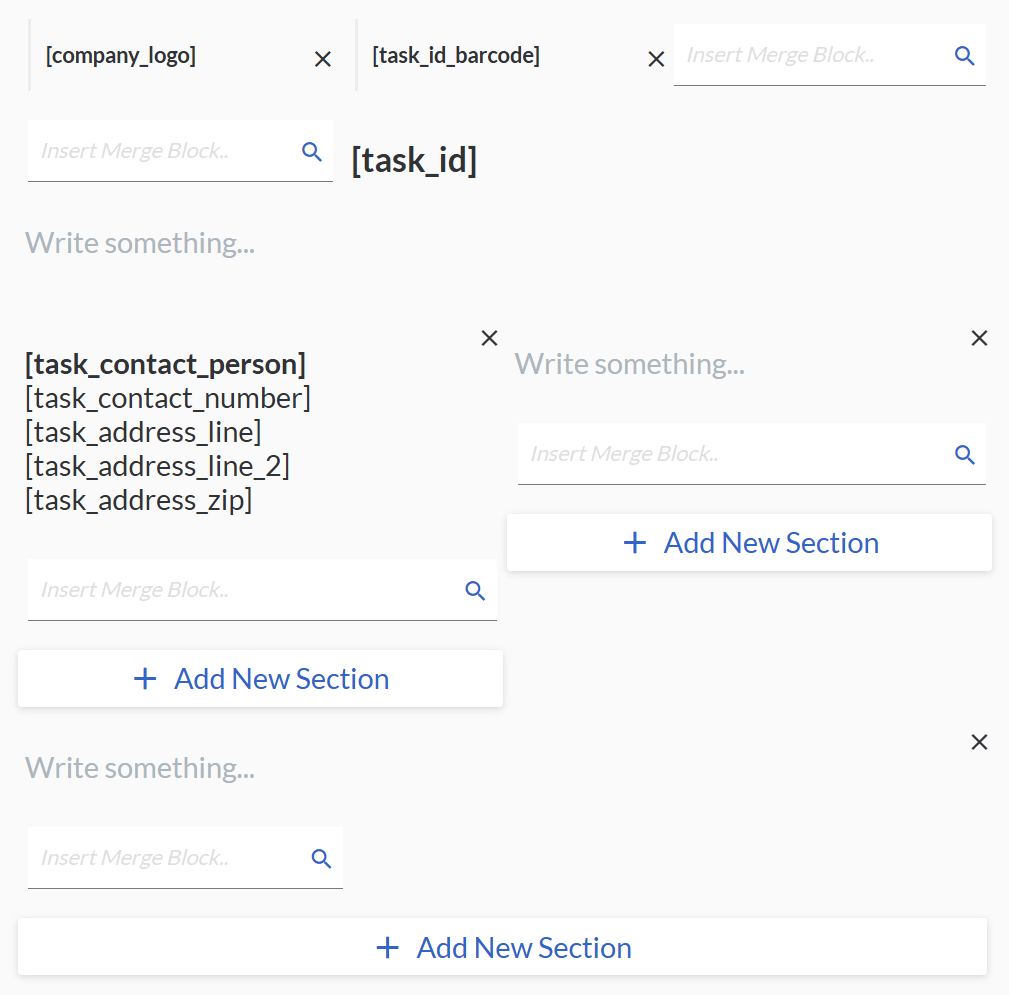
- You may add or edit a section and insert a merge tag or merge block:
- Merge Tag: You may insert Merge Tags into the free text portion.

- Merge Block: You may also insert a Merge Block at the bottom part of each section.
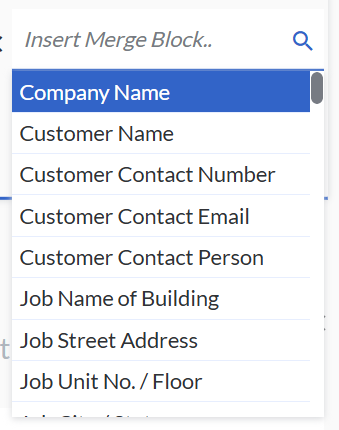
- Merge Tag: You may insert Merge Tags into the free text portion.
- You may add or edit a section and insert a merge tag or merge block:
- To preview a task label, click on Preview Label.
- Hit Save Configurations to save the label.

Print Label
To print a label,
- Go to Planning > Tasks and select a task to print out.
- At the right, hit Label.
- The Label will be generated in a new tab and you can print it out from here.