Once you have your customers' information in VersaFleet, you can start to create jobs. To understand more about how we define Jobs and Tasks, read the Understanding Jobs and Tasks article.
Creating Jobs individually
- Go to Planning > Map or Planning > Tasks
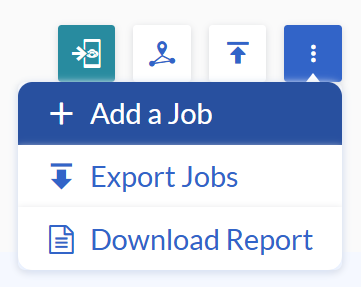
- Hit + Add a Job to create a new job
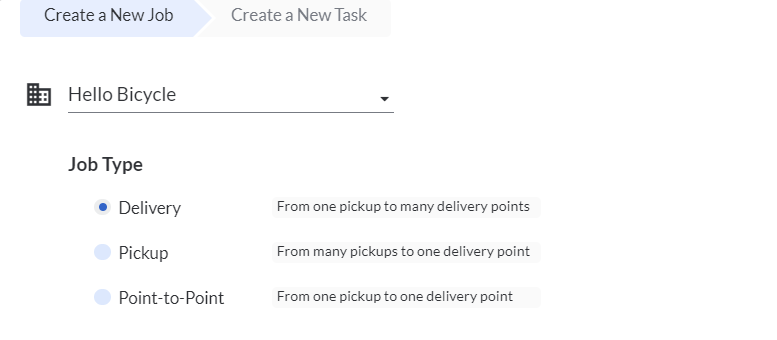
- Fill up information about the Job,
 The next section is for the Base Task.
If you have selected 'Delivery' or 'Point-to-Point' as the Job Type, the information keyed in will be for the Base Task - Single Pickup.
If you have selected 'Pickup' as the Job Type, the information keyed in will be for the Base Task - Single Delivery.
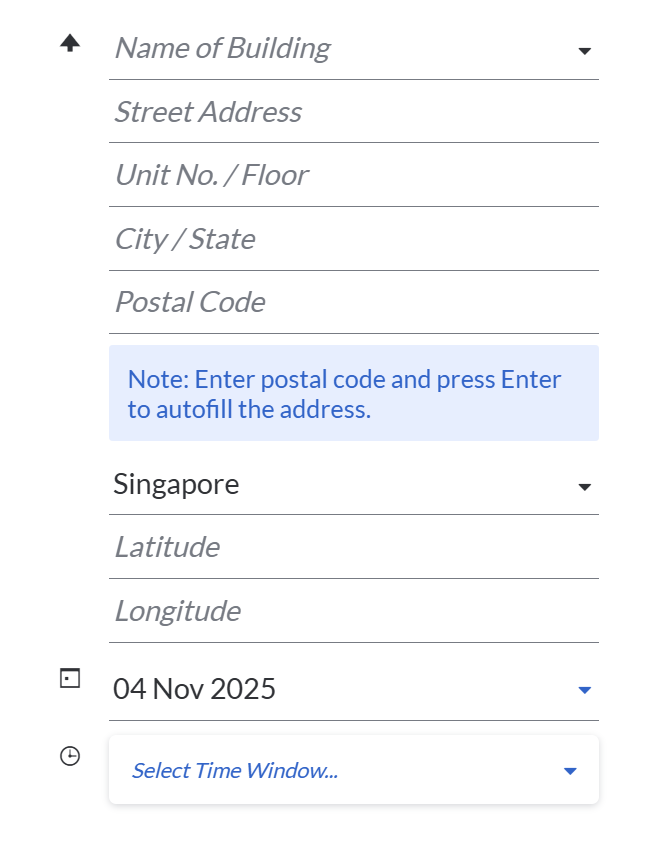
The compulsory fields are:- Customer's Name: Choose from the drop-down list or add a new customer
- Street Address: Choose from the drop-down list (Linked to Our Locations) or add an address
- County: Choose the country
- Date: Choose the date
- Time: Users should create their own custom time windows in Settings > General > Time Windows
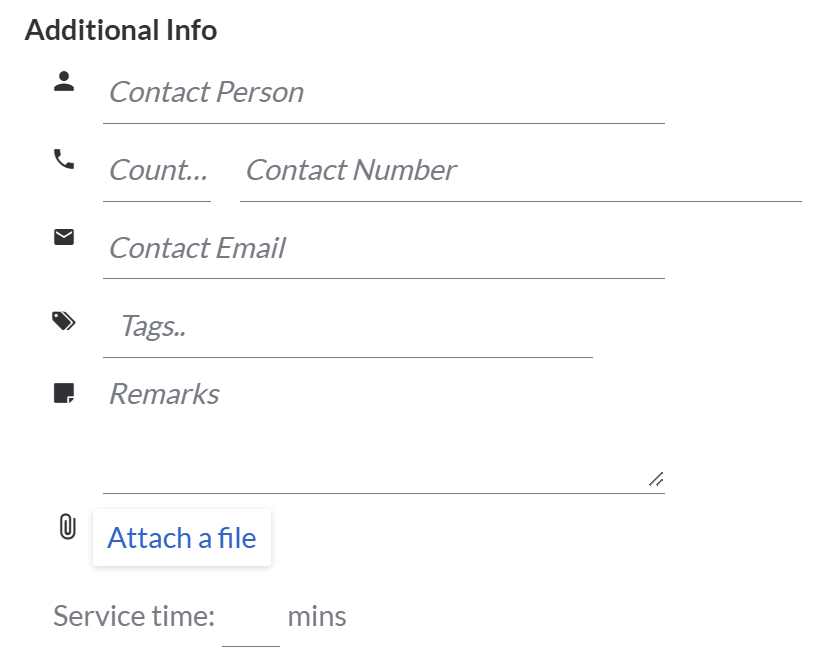
- You may fill up some additional information about this job, but these are optional fields.
- Contact Person: Person in-charge of pickup / delivery
- Contact Number: Person in-charge of pickup / delivery contact number
- Contact Email: Person in-charge of pickup / delivery email
- Tags: The labels to group related jobs together and to quickly tell users and drivers what they are about
- Remarks: Notes of the tasks (keying in multiple lines)
- Attach a file: Any document to attach during pickup / delivery
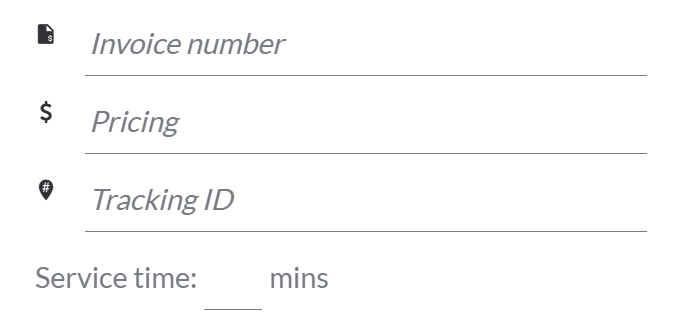
- Service Time: Time taken by the driver to spent at the warehouse
- Next, hit + Add a Task to proceed with adding tasks under this job.

- Fill up information about the Task,
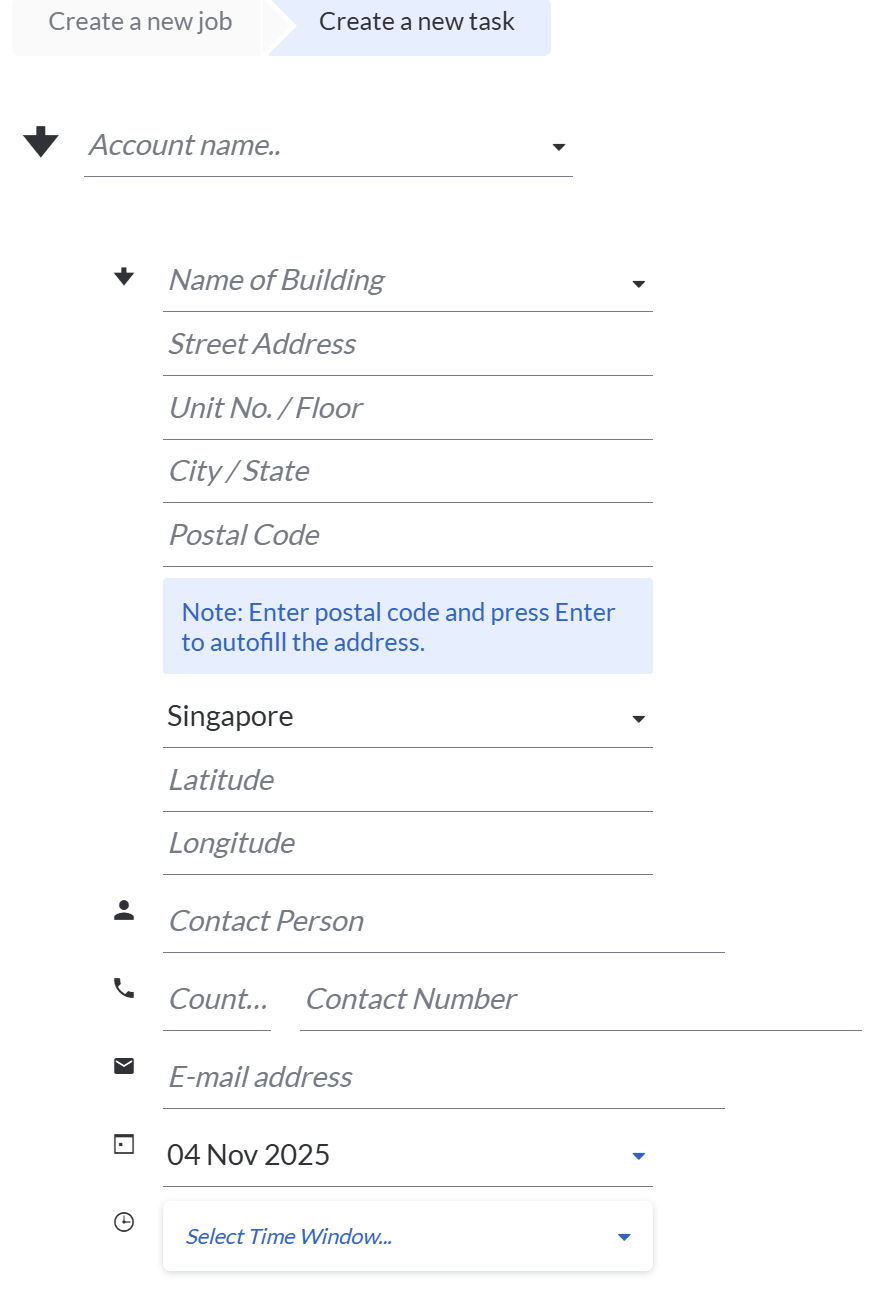 Deliver to / Pickup from - this will be the information for the task. The compulsory fields are:
- Street Address: Choose from the drop-down list (linked to Account Addresses) or Add a new address
- Country: Choose the country
- Date: Choose the date
- Time: Users should create their own custom time windows in Settings > General > Time Windows
- You may fill up some additional information about this task, but these are optional fields.
- Tags: Labels to group related tasks together and to quickly tell users and drivers what they are about
- Some ideas for Tags:
- Zonal Clustering: Add a tag for the general location of a task.
- Trip Management: Add a tag to identify whether it's a Single or Return Trip
- Task Management: Add a priority label to tasks - Express, Urgent or Priority
- Type of Items: Add a tag for the type of items - Bulky or Fragile
- Resources: Add a tag for the type of vehicle needed or any additional equipment needed
- Some ideas for Tags:
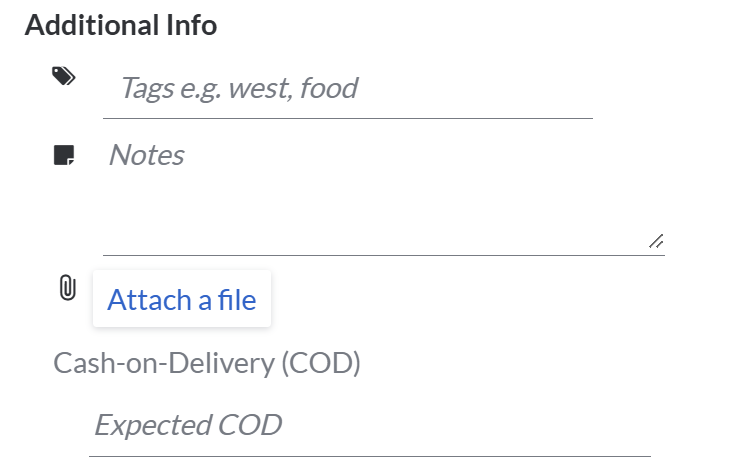
- Notes: Notes of the tasks (keying in multiple lines)
- Attach a file: Any document to attach during collected/delivery
- Cash-on-Delivery (COD): Key in the expected cash to be collected. Your driver would be able to see this amount and report on the actual amount collected upon delivery.
- To better track and trace back this task, you may include the invoice number and tracking ID
- Invoice Number: This is not restricted to just invoice number, you may choose to use this field to key in the delivery order number or sales order number
- Pricing: Cost of the task
- Tracking ID: This is useful if you would like to customise your own Tracking ID for your customers to track this task on their own. Each Tracking ID should have at least 11 alphanumeric characters. Spaces and all special characters (with the exception of ( ) - { }) are not allowed.
- Tags: Labels to group related tasks together and to quickly tell users and drivers what they are about
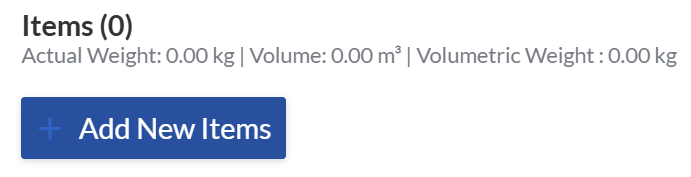
- Hit + Add New Items to add items to this task
 Key in Qty, SKU and Description, as well as the dimensions. You may switch to a different system of measurements or apply a shipping factor if applicable.
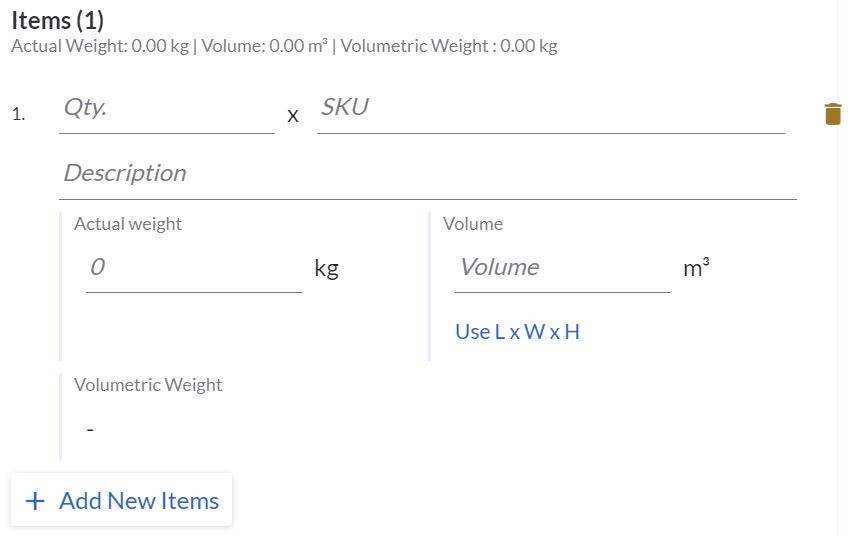
- Hit + Add New Items to create multiple items under the same tasks.
- Once you're done, hit Save Task

- Repeat steps 5 - 7 to create multiple tasks under the same job.
- Hit Save Job to create the job.

Creating Jobs through the Import function
You can import lists of jobs into your VersaFleet account after creating a spreadsheet of pending jobs. Ensure that the Customers and Accounts have been created and the addresses are already in VersaFleet.
- Go to Planning > Map or Planning > Tasks.
- Select the Import Jobs button on the right.

- Click 'Download our template' to download the Import Jobs Template and open the spreadsheet.
- In the Jobs Tab, fill in Job information according to the fields in Row 2. The examples are shown in rows 4 onwards which you should delete before saving the file.
Fields with the asterisk (*) are compulsory - the file will be rejected if the compulsory fields are blank.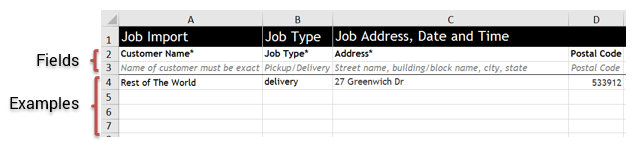 Note: Time is in 24-hour format
 - Save the file once you're done.
- Back to VersaFleet, click Attach a file and select the spreadsheet.
- Hit Import Jobs and the information will be saved right into VersaFleet.
Tips for Import Jobs
- Multiple Tasks and Items
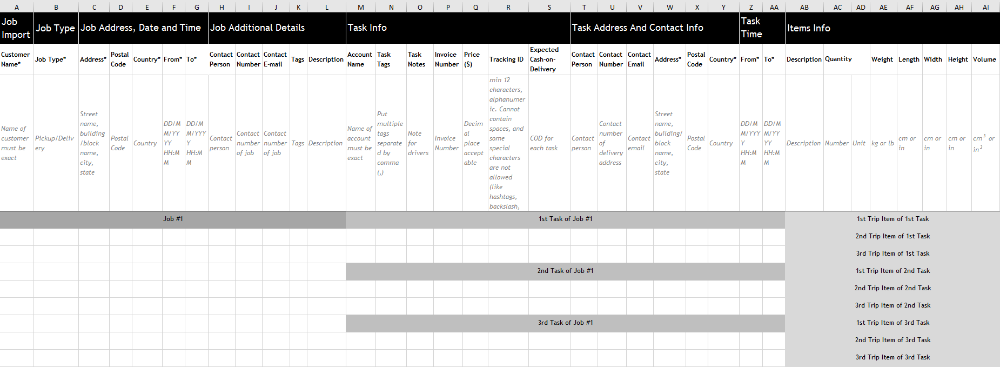
- To create multiple tasks under a single job, you have to leave Columns A - Q blank and fill up Columns R to AK in the subsequent rows
- To create multiple items under a single task, you have to leave Columns R to AK blank and fill up Columns AL to AS in the subsequent rows.
- Your Job Import Template should roughly look like this:
- Postal codes that start with '0'
- Some postal codes may start with '0' and it may not appear when the task is created. To ensure that the '0' is there, add an apostrophe (') before the postal code. This forces the numbers to be treated as text by Excel.
- Some postal codes may start with '0' and it may not appear when the task is created. To ensure that the '0' is there, add an apostrophe (') before the postal code. This forces the numbers to be treated as text by Excel.

Printing out Jobs and Tasks
Jobs printout (Base task together with tasks)
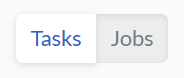
- Go to Planning > Jobs
- Select the Jobs view
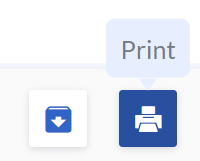
- Hover over the Job you want to print and click on the Print button
Tasks printout (Airway Bill/ Consignment Note/ Parcel Label)
- Go to Planning > Tasks
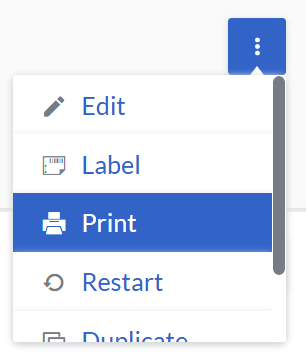
- On the right, hit More actions and click on the Print button
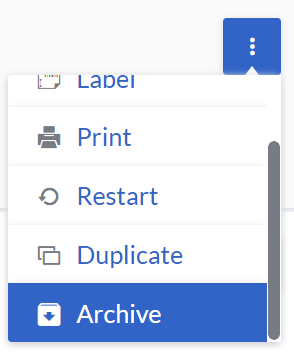
Archiving and deleting Tasks
Tasks can be removed temporarily by archiving them, or permanently by deleting them.
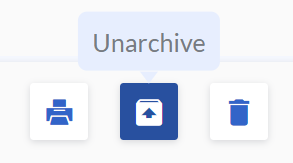
To archive a task,
- Go to Planning > Tasks.
- Select the task you'd like to archive and click on the Archive button.
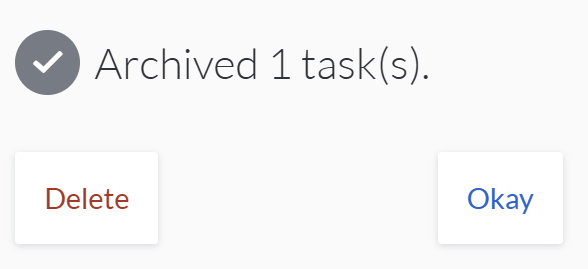
To delete a task,
- Once archived the task, it will shows the Delete button.
- Hit Delete button and it will give 3 second before confirm delete, and hit Delete button again.
 Note: Tasks that have been deleted will not be found in Archives > Tasks and will not be able to be restored.
Alternatively, you may head to Archives to delete archived Tasks.
Restoring Archived Tasks
To restore a Task,
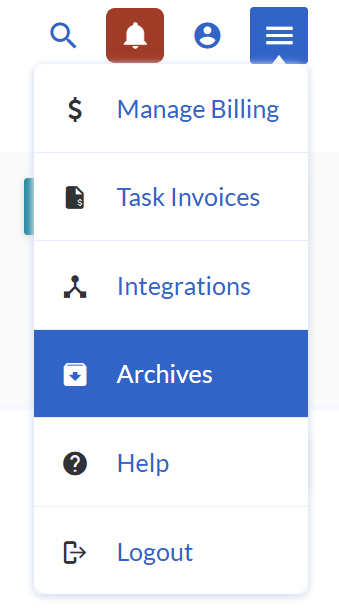
- From the menu on the top right, select Archives > Tasks
- Select the tasks you'd like to restore and click on the Unarchive button.